iphone

Scenics in Banff, Canada (part 2)

While in Canada and Banff, I took a number of images on my point-and-shoot camera and iPhone. Part of being creative I think, is just taking photographs everywhere, and using any and all tools, including small cameras.

Many times I’ve looked back on my life and have found that I have beautiful images of the places I’ve been, but no images of myself. As we get older, we wish we had images of ourselves at certain times, so I’ve made it a goal to try and include myself in more photos, even if I don’t like them at the time. It’s always good to have photos to look back on.

Cox_Personal-1094-edge

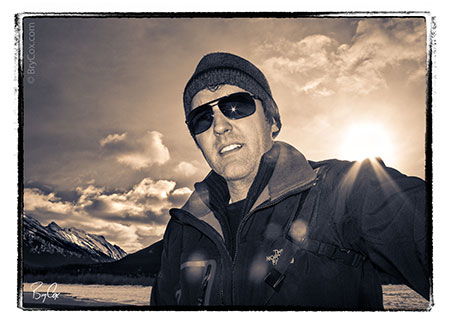
I particularly love my point-and-shoot, because it is a professional version with full manual controls, dials instead of menus, and it captures in RAW so I can edit it or convert images to black and white with more clarity. I have it rigged with an extendable stick so that I can get photographs of myself when I go places, without having to rely on strangers for focus and composition.

Cox_Personal-1095

Cox_Personal-1083

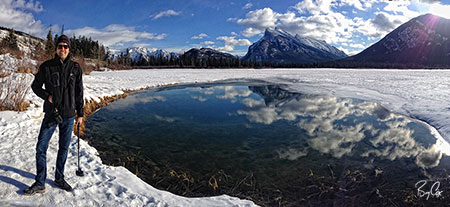
Below is a panorama created with the new iPhone 5. It does a fast job of panos, and in this image you can see my main camera around my neck and my point-and-shoot camera on an extendable stick in my hand.

BryCox_Banff_0455-800p

The rest are some iPhone images of my trip. I like shooting for fun with the iPhone, because it’s a challenge. There are no controls, so you have to think differently when using it — you have to think around the fact that you can’t control some things, yet you still have to make the image artistic and work.

BryCox-Canada_iphone_01

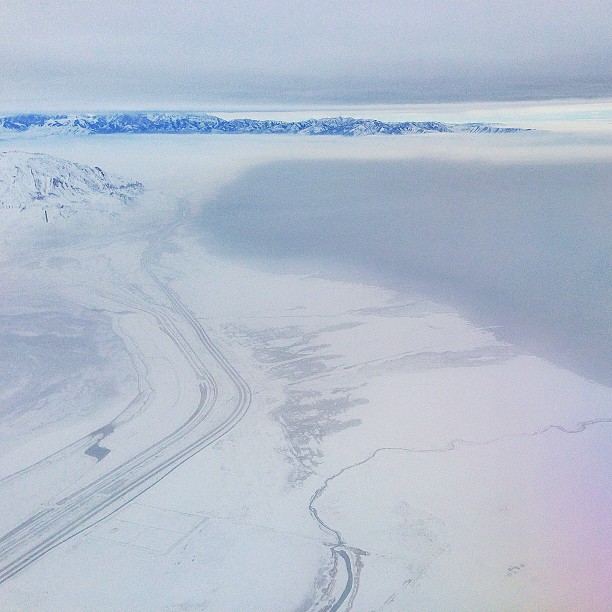
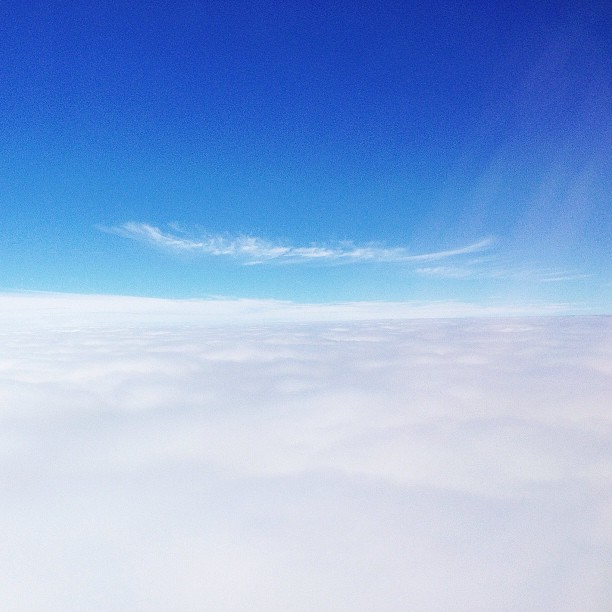
These first two images (above and below) are me flying out of the inversion and bad weather of Utah and seeing some blue sky again.

BryCox-Canada_iphone_02

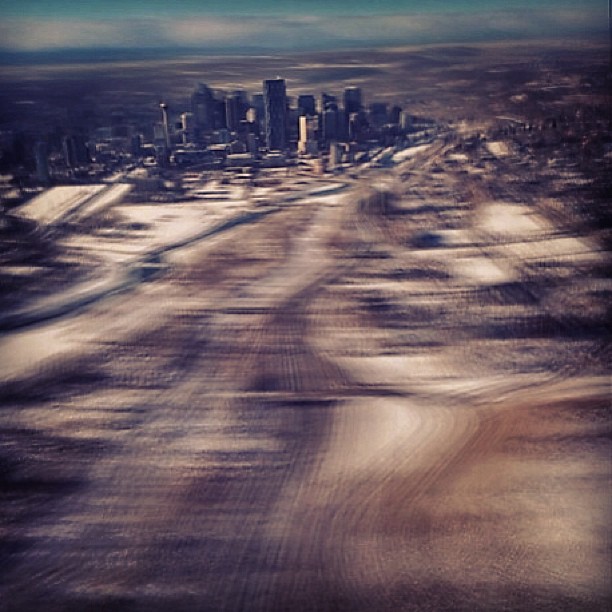
This is me flying into Calgary. I dragged the exposure for motion blur.

BryCox-Canada_iphone_03

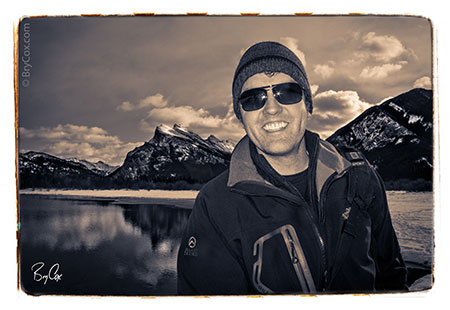
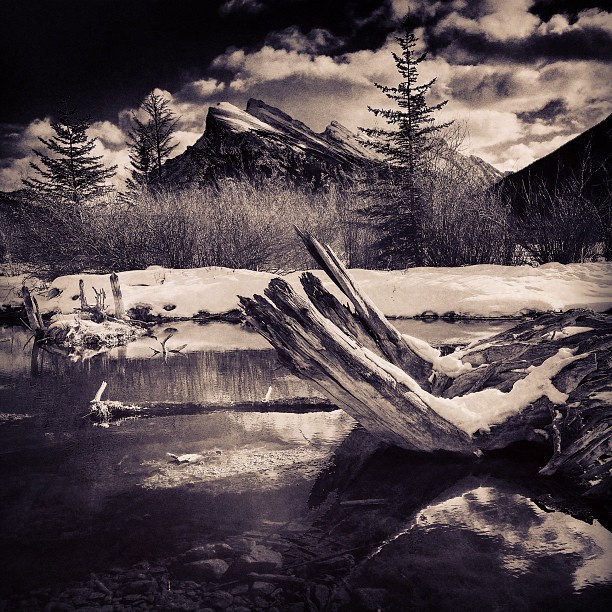
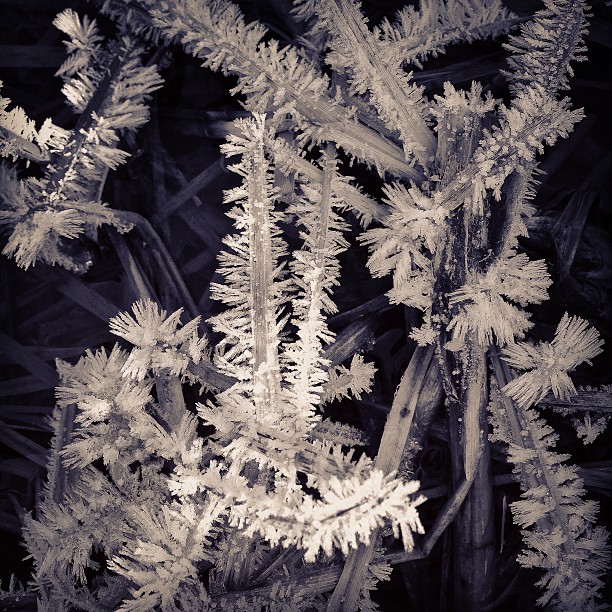
While shooting scenics in Banff, I shot some on my iPhone as well. I really like this image in black and white.

BryCox-Canada_iphone_04

Here is some close-up details of frost on some grass coming out of the frozen lake.

BryCox-Canada_iphone_05

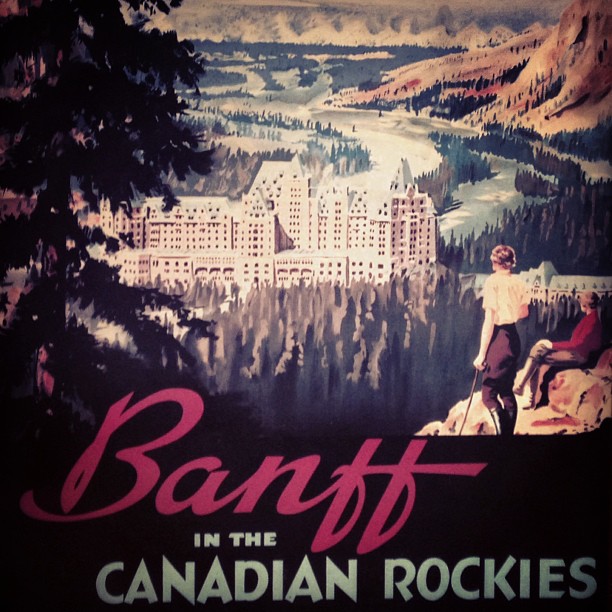
My friend Cam took me to see the Banff Springs Hotel, and inside was this old ad.

BryCox-Canada_iphone_06

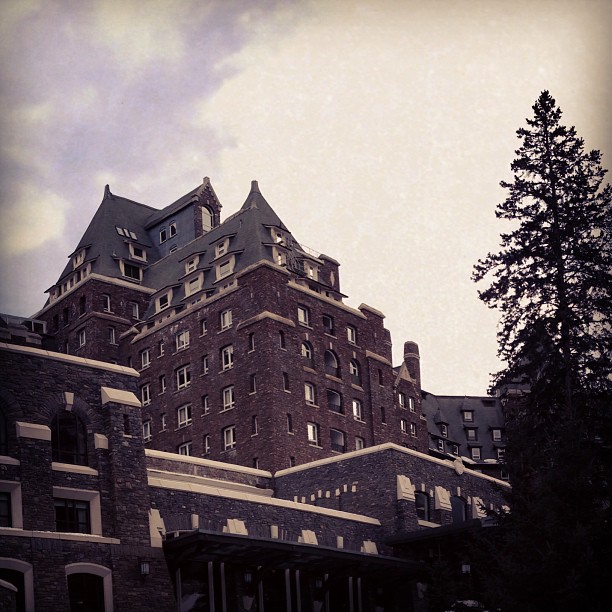
Here it is from the outside.

BryCox-Canada_iphone_07

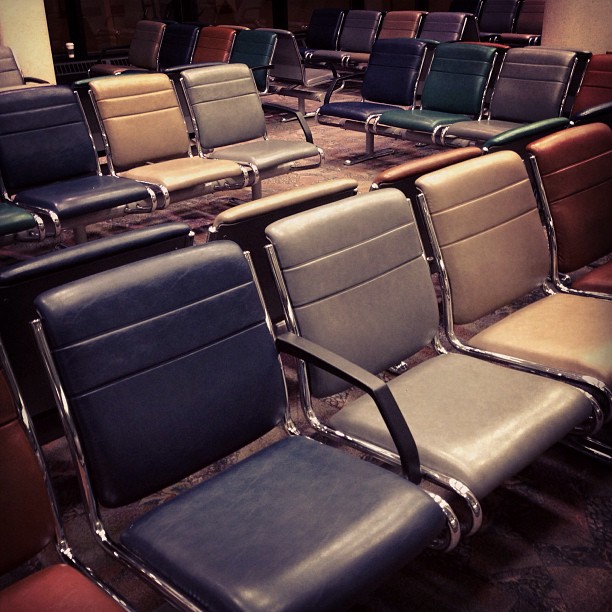
And finally, as I was leaving Calgary very early in the morning, I found myself alone in the airport. I really liked the lines in this image, along with the 70’s looking multi-colored chairs.

BryCox-Canada_iphone_08

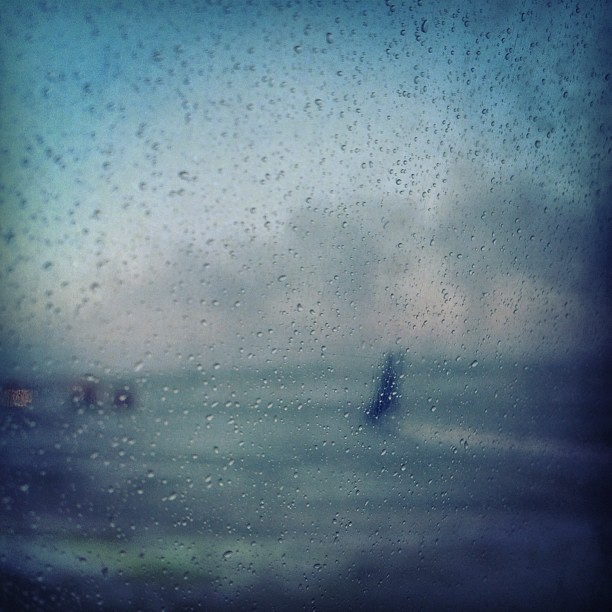
Once on board, the flight was delayed due to a storm. I took this looking out the window of my airplane, waiting for takeoff.

BryCox-Canada_iphone_09

Well, that’s it. I hope you enjoyed seeing these images. Make sure you check out the previous post (part 1) to see the scenics I took while there.

Until next time, America.


Scenics in Banff, Canada (part 1)

After speaking at the Alberta Professional Photographer’s Convention this month in Calgary, I took a free day to go to Banff. Here are some of the images I created that day.

I was taken there by a long-time photographer friend of mine, named Cam Colclough, that I met over 10 years ago in Oregon when we were both speaking at the same convention. We’ve stayed friends ever since, and he was kind enough to take me on a tour of some of his favorite places in Banff.

And here are some of the images I created in this area. I really loved the slanted mountains and awesome clouds in the background. It helped give me some contrast and directional light on the mountains, so I worked to create a variety of images by changing the foreground. A good foreground helps create depth, especially when there’s great depth created naturally by the lighting.

I was lucky to shoot these when I did, because right soon after, the weather changed dramatically, everything became foggy and overcast, and shooting scenics was no longer an option.

I really like all four of these scenics for different reasons, but I am having a hard time deciding which one is really the best. Which are your favorites? I’m curious as to what others are drawn to and why.

As part of my Banff Part 2 post coming up, I’ll show a completely different set of images — fun images I created solely on my iPhone and point-and-shoot camera.

Until next time, America.

Shooting Model & Seniors in Washington (Evergreen Workshop part I)

I taught a weeklong photographic workshop called ‘Evergreen’ outside of Seattle in a small town called Port Townsend. Here are some of the images from that event.

Usually as I travel and move, I create images — it’s like a part of my brain that doesn’t turn off. I see abstract shapes in everything around me.

For a while now, I’ve created some of these images on my iPhone because it makes it extra fun. You see, the iPhone in its simplicity, doesn’t have any exposure controls, so so I have to think around its limitations. That particular method of thought makes me think differently and I tend to create different images than I normally would.

While teaching, I demonstrate various types of equipment and techniques. All of these image were created in front of the group, from the initial creation, to the workflow and the final retouching.

We also used a minimal amount of equipment, staying as mobile as possible, and used backgrounds and locations right there within walking distance. When I’m shooting at a workshop, I specifically like to focus on teaching three things:

1) Make the most of what you’ve got. For instance, instead of wondering if there’s a better place nearby, instead ask yourself how you can make a particular area work as a cool background?

2) We don’t want just good images, we want to create fantastic images that have punch and emotion.

3) We want all the work to be done in camera so that we don’t have to fix anything later. The images should be perfectly exposed, have the perfect color balance, have a strong emotion and believable expression, and be lit with control from the right angles. That way anything we do to the image later will be for fun instead of to fix it.

Most of these images have very little work done to them, and what work was done was done quickly in front of the class using special techniques and some of my specific products. In fact, using these techniques it seems that it actually takes more time to pick favorites than it does to finish them up.

So these girls told us that a lot of local photographers use the area for senior shoots, so we really wanted to create unique images, find cool nooks, and use the area in new ways.

I think you can tell that the shoot was a lot of fun for everyone.

Hopefully you can see that we really created a lot of variety, and used all sorts of areas to our advantage. We wanted to create a lot of different looks as quickly as possible, and make something wonderful from each spot.

That night after dinner, we invited the girls to come meet us in town for some night shooting. Instead of the normal dark or flat images that are typical at night, instead I showed how to create depth and how to get perfect exposures while working with various off-camera flashes.

The challenge here was to show that no situation is difficult when we really understand light. Below, is a mulit-light setup using a streetlight for interest. I angled her so that the wind was working with her hair, and I really like how these turned out.

And finally we took our model Lane, out on the pier, looking out towards the water. The first image is a photograph, and the second is a painting that I created from another photograph in the series.

If you’re looking to attend one ofmy photographic workshops, please check out my workshop site, at BryCoxWORKSHOPS.com. There are new ones being announced all the time. I hope to see you at one soon.

Until next time, America! 🙂

Big Yellow Moon on the Rise

The other night the moon was supposed to be extra big and bright (news story) which won’t happen again for two more decades. I set out to a secluded place near my home and set up my camera on a tripod to wait for the moon rise. It was a fun and cold night. I had just got back from Texas and was used to the warm weather, and the cool spring night here in Utah made for a fun adventure.

I started out shooting the sunset, as there was about a 15 minute difference from when the sun would set and the moon would rise. I shot for HDR which means you shoot a couple exposures to capture the shadow and highlight details and then sandwich the images together in one image, but ended up just using single exposures as my final images as I feel they look much more natural and esthetically pleasing. Here’s a pano looking west to the sunset.

During twilight, I created some long 30 second exposures of the ground and scenery around me. I really love the next two images and the blue in them.

I especially love the direction of light and the high horizon in this one below.

I was using an iPhone app which pointed to where the moon would rise. I waited for it to peak above the clouds and began to shoot. I really like this image. Everything is so blue.

I pulled back for another image, showing more foreground. I could have digitally enhanced and lightened the grass and foreground, but I prefer it like it is, feeling dark and cool like night.

I zoomed in to capture the moon, but by now it was climbing fast.

The higher moon gave me a bit more light to work with, and I took one more with a lot of foreground and a high horizon, hyper-focal focusing to get as much in sharp detail as possible, especially for such a long exposure.

I really like how these turned out, but nevertheless it was just fun to be outside and enjoying the cool night, looking at the moon. I also created a few images on my iPhone just for fun. Here’s when I first arrived…

My camera and the moon while creating the last image above…

Some weeds against the night sky. I shot this while walking back to my vehicle…

And one more of weeds that I sent from my iPhone to my iPad using PhotoStream, then edited on my iPad to create a pseudo painting. I really like the colors in this a lot.

Well, that was my Big Moon Adventure. If you love photography like I do, and you understand the value of a great image that can stand the test of time, then give me a call. Now is a great time to set up your Spring appointment for your family portrait. Give me a call at 801-728-3317 to schedule a time. And feel free to browse my main website at BryCox.com.

New Orleans Street Photographs

In January, I spoke at the national photographic convention in New Orleans, called ImagingUSA. After working, and having been there before, I took some time to walk down some of my favorite streets to create some fun images.

I processed these images out using some of my new b&w and toning effects as well as come of my custom made edges that I create and sell to other photographers as well as use myself.  I’m really happy with these images and how things turned out.

I feel that these images are especially interesting, and the look I’ve used just accentuates that. These images make a great series of my trip there.

It was a fun walk, but I had to hurry and move quickly through the streets so that I could catch to my flight home in time. I found it interesting how so many buildings had similar windows, stairs and textures, even though the colors where so different. The similarities really show in these b&w images.

I also walked to an old cemetery I remember finding last time I was there. I really liked this area and wished I had more time to really play and photograph the area. Nevertheless, I still created some cool images. The trick is to shoot this in such a way that you don’t show all the people walking through, or the modern buildings behind the tombs. Those things would have been very distracting in the final images.

I had to get at least one image of me, and chose to do it in an abstract way, using my shadow.

Here’s one in color. It’s the top of a pyramid shaped monument. The others I created for b&w, but this I never even tried converting it. It was meant to be in color, even though it sticks out of the series.

I love these iron gates, with the shadows they created. The lines and textures were very exciting!

So as I was walking back to my hotel to head off to my flight, I passed one last time this large abandoned office building. It’s very weird to see such a large building completely empty and I had been passing it multiple times daily while there.

I also found my name on one of the sidewalks.

And finally, I created this painting while I was there using an image I took with my iPhone while going to a vendor party one night on Bourbon street.

I’m very happy with my street images and walk-about. It was a good way to end the trip.

Last time I was in New Orleans, I focused on people I saw while walking around.  This time I focused more on textures and lines.

If you’re a photographer and would like to know more about my workshops or speaking schedule, check out my workshop website at BryCoxWORKSHOPS.com.