clearfield

Abby’s Studio Shoot

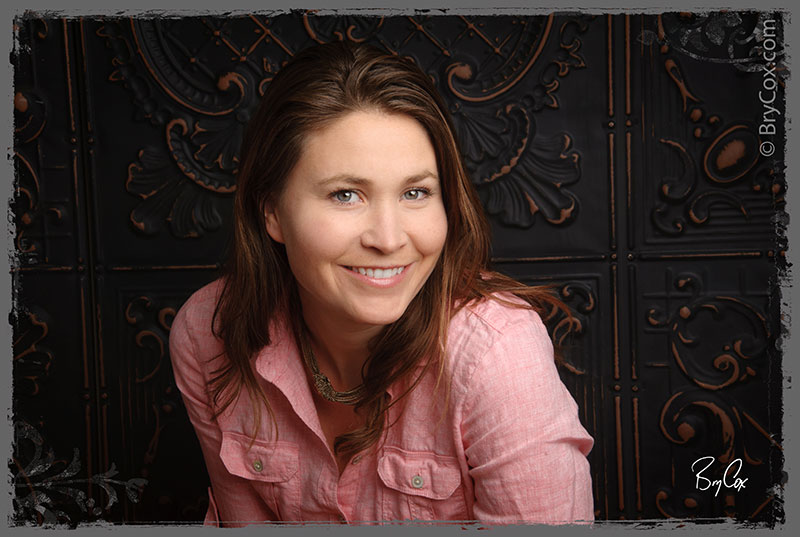
I recently photographed Abby in my studio for my recent lighting video tutorials for photographers. Abby is a talented architectural and interior designer, and was at my studio because I was working on some interior images for her and designing un updated website for her business. (I think it would be a good idea to post about her business on my blog actually. I will do that!)

So I needed a studio model for my tutorial and talked her into doing a quick shoot when we were done. The shoot went great and the images look beautiful.

BCox_LightingDemo_05

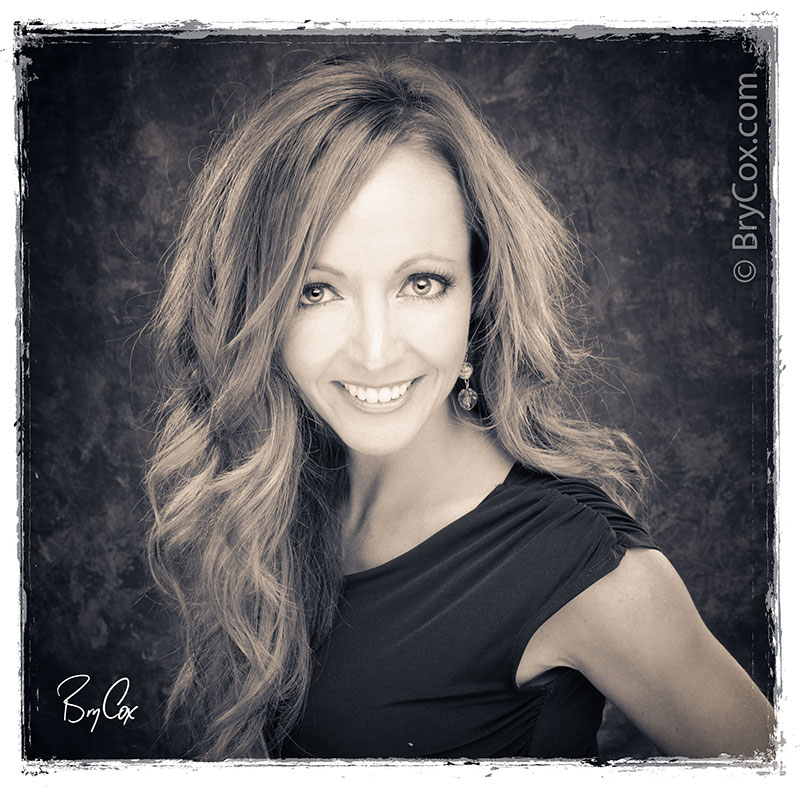
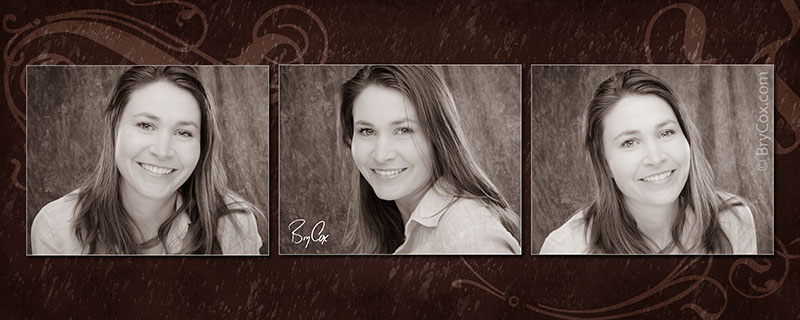
As you can see, Abby is a great model. She’s beautiful and fun to shoot, and did well and showed a lot of personality in front of the camera. All of the images looked great, and it was hard to pick any favorites. I especially liked this series of three images below.

BCox_LightingDemo_04

These video tutorials were created because as I’ve taught and spoke around the country, I’ve found that most photographers admit to having personal difficulties when they light either inside or outside. One or the other seems to be harder, so this video series is to help give photographers a specific system that works everywhere. It shows that lighting inside is no different than lighting outside. The system shows that in all instances, you should light people specifically and beautifully, and always control exposure, lighting, and color balance. When done right, images straight out of the camera do not need retouching or correction. So if you want to spend time on the computer, it can be creative work and not corrective work.

BCox_LightingDemo_06

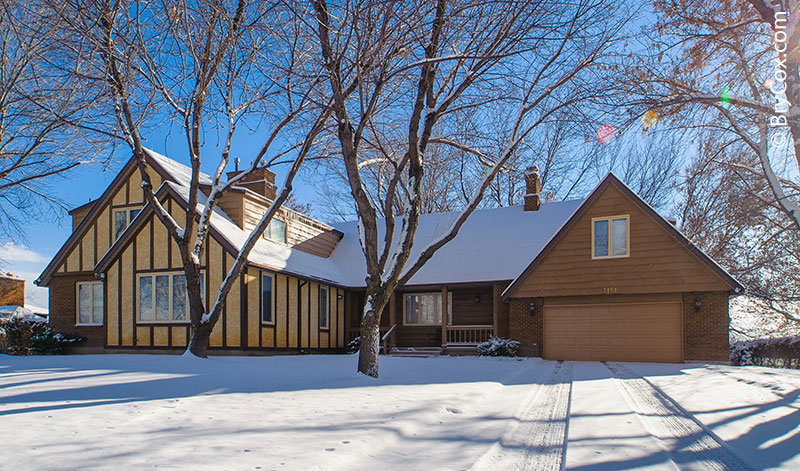
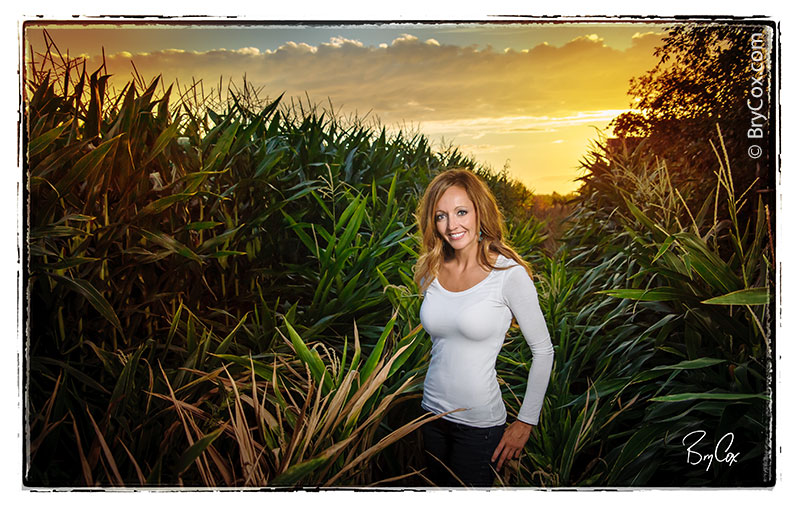
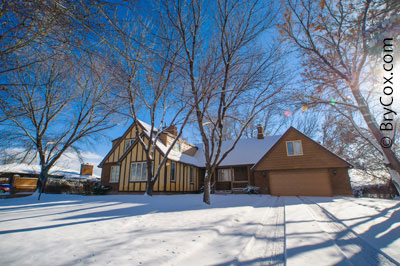
Though I may speak and shoot images all over the US, I’m a Utah based photographer and my studio is about 30 minutes outside of Salt Lake, out in the quiet country. Here I have both indoor and outdoor options. I have a half acre of trees where I can shoot outside, but also a beautiful studio inside. This means I can photograph people in a variety of locations without travel fees.

However, sometimes when people don’t want studio images. This is based on the awful images created in grocery store or mall studios, or even the 1990’s type studio images. But a studio used in the right way means getting some very modern images with some very specific and controlled lighting. It’s not uncommon for clients to come to me for some outdoor portraits but then choose the indoor studio images are their top favorites.

So if you need some awesome images, give me a call. Maybe you need a portrait for your website or business, or you would like some fashion images or some portfolio work, or just some updated family portraits. If so, give me a call. It’s a great time to get in for either an outdoor or indoor session. 801-728-3317.

And until next time, America.

How I Created My New Christmas Card, A Self Group Portrait

My Christmas Card is out and in the mail. If you haven’t seen my past Christmas cards, for the last few years they’ve all been group portraits of me, but in the studio. My idea is that it’s a funny company group photo from my own Christmas party. My clients know that because of the custom work that I do, I personally see each job through from beginning to end, which also means that I wear a few different hats. The card is a growing joke, and each time I’ve done it a little better. But this time I really wanted to out-do myself!

Cox-Christmas-2013-Card-Design-2-final

Clients, especially children that come in are always asking me how I shoot my group photos of myself, so I decided to share with you my process.

First I mapped out the entire shot, and decided on which images I’d need, where the various people would be positioned throughout the image. I needed depth, but didn’t want anyone in front of anyone else. I even have three people tied together with garland, all handing each other the same strand. It all has to look real and work. Each person had to be working together naturally, and that meant thinking about how the angles and lighting should be.

Once it was mapped out, I began photographing the pieces. I started with my studio/home. I needed to use open area of the front and didn’t want it covered with the cedar fence and line of trees in front. So I used a wide angle up close to get the entire home in the shot without the fence and trees you’d see from the street. This gives me the best angle on the place but causes bending on the vertical lines, that I will fix later.

Cox_Christmas2013-104

Next I photographed my folks’s tree in their home. My mom always puts together the best tree.Cox_Christmas2013-114

Then back at the studio I photographed each remaining part on my fashion gray background so that they could be extracted off the background easier. Extractions are not easy nor fast, but a solid gray background makes it easier at least.

To fit a large ladder in the studio on gray, I chose my smallest ladder, and doubled the size of the legs digitally, adjusting too for the perspective of the steps. I then photographed each version of myself, imagining where each would be positioned in the final image, but used the same step on the ladder to stand so that I’d fit in the studio shot.Cox_Christmas2013-group
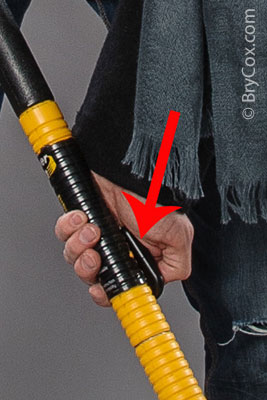
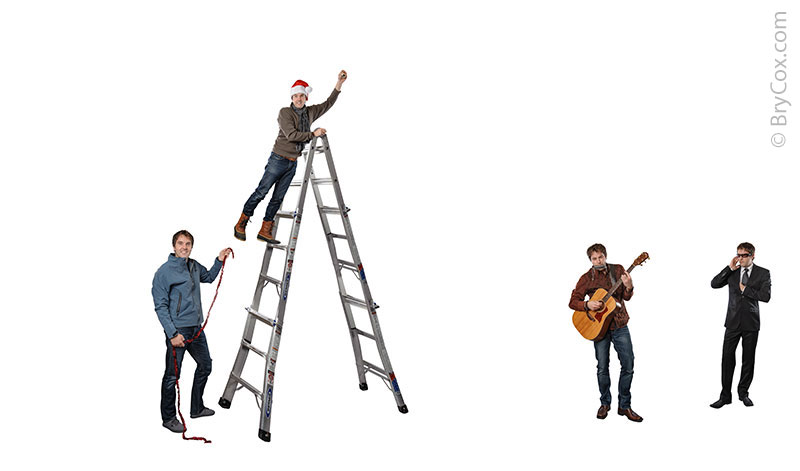
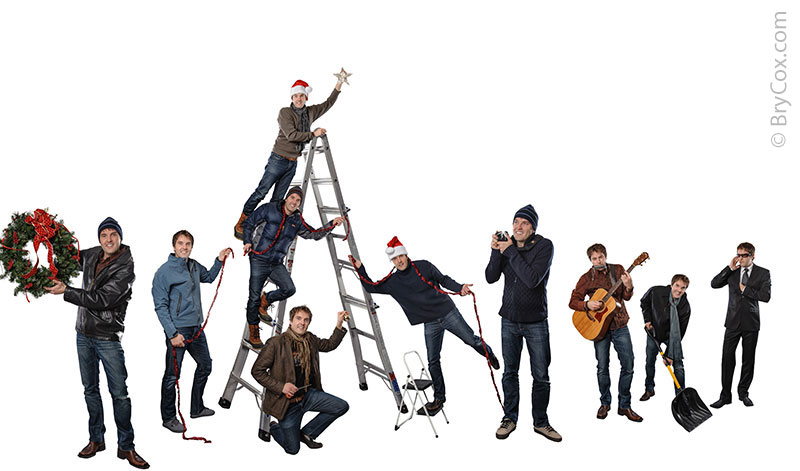
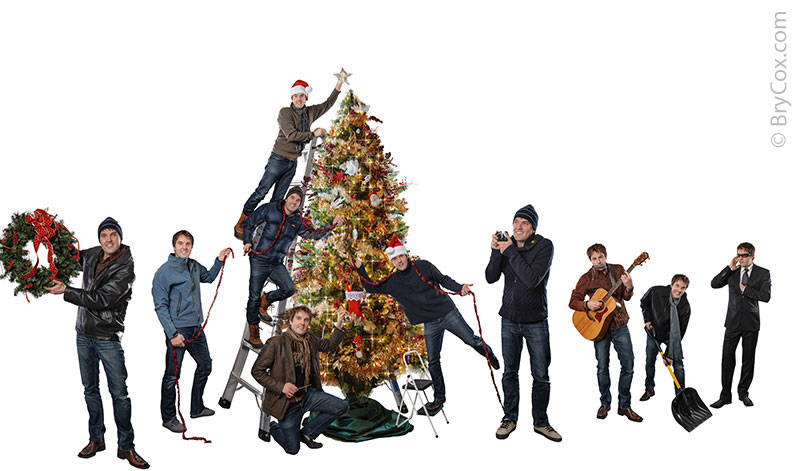
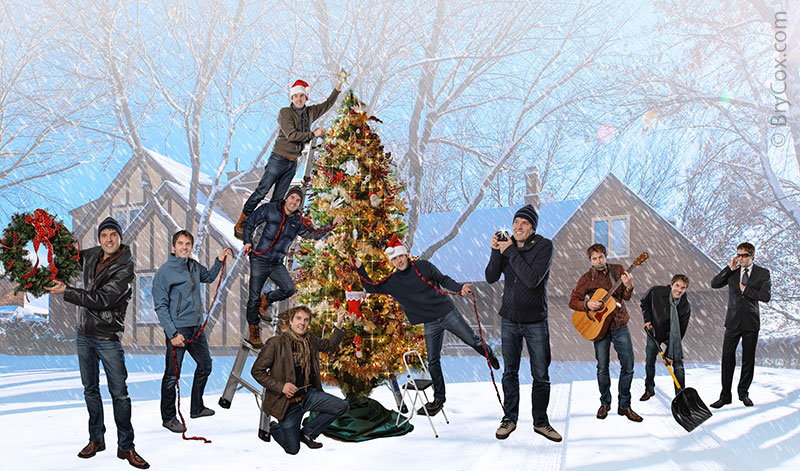
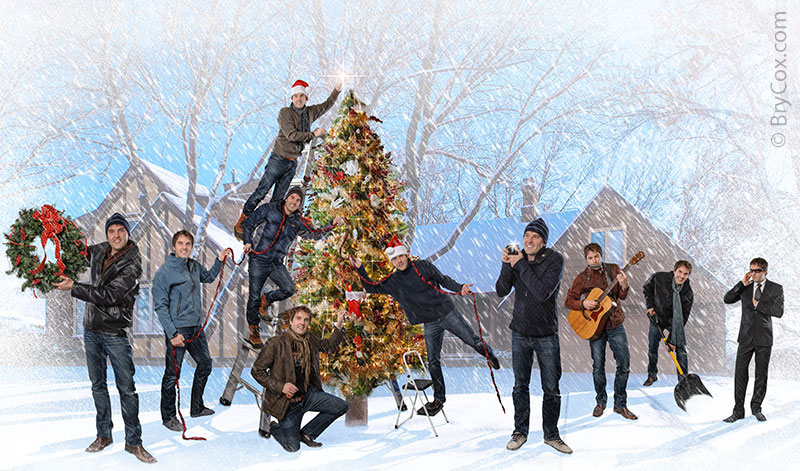
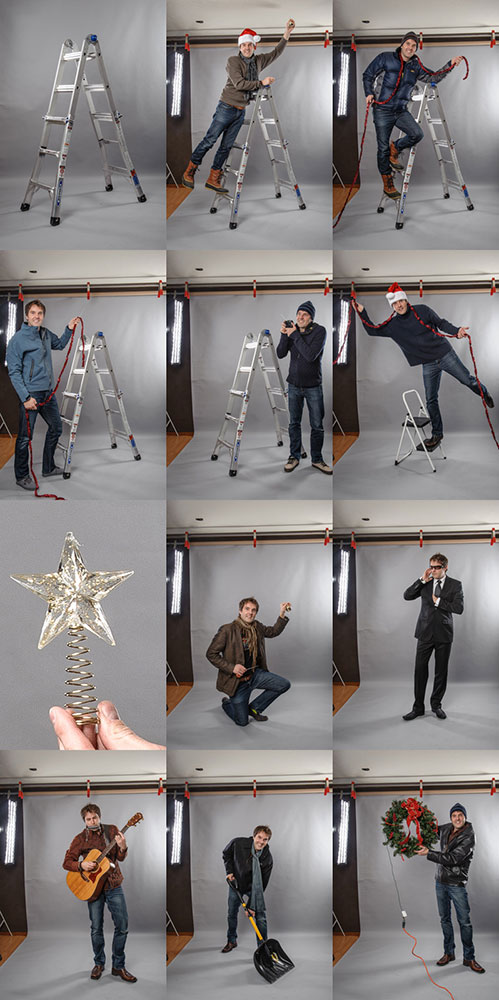
Each photograph was fired with a remote that I am holding with one of my hands. For instance, in the shovel image, I’m holding the remote up against the shovel’s handle. Once I’m in position, I fire the shot. After each shot, I change clothes, set up the next image, and shoot again.

Cox_Christmas2013-198-2

After all the camera work, the digital work begins. I started with the individual versions of me, each extracted off the gray background and placed in the shot where they were mapped out. The ladder was also extended taller, being key to making sure all the other people were in the right spots and in proper perspective.

Cox-Christmas-2013-Card-Design-1b

Slowly the group began to grow, and the star was added in the hand on top.Cox-Christmas-2013-Card-Design-1c

Then I extracted the tree off the living room background and prepped it.

Cox-Christmas-2013-Card-Design-1a

The tree was brought in and more details were brought together.Cox-Christmas-2013-Card-Design-1d


Then to the background. I corrected the vertical lines, and the image was cropped to fit the final piece.Cox-Christmas-2013-Card-Design-1e

I then created snow from scratch and added it throughout, fading out the home as well for a misty look and to keep the background from being too busy and competing visually with the foreground.Cox-Christmas-2013-Card-Design-1f

The background was added to the crowd, and more details were added like sparkles on the Christmas tree’s lights.Cox-Christmas-2013-Card-Design-1g

Once the background was in, people needed to be moved slightly on the right side to work better with the background. Once they were in place, shadows were drawn in so that each person and object cast a shadow that matched the lighting from the sun behind. Each point of contact with the snow was then painted up close so as to “drop” everyone into the snow so they didn’t look like they were on top. That, along with the shadows, help give the final piece a more 3D look and not a flat, fake look. There’s much more I could do to make it look real, but a little of that fake look will help with the comedy effect.

The star was also given a nice sparkle. More snow was added around the edges to create a natural white vignette to keep the focus inside the image, and the tree’s trunk was finished as well.

Cox-Christmas-2013-Card-Design-2h

Finally, I used one of my custom edges to finish the piece, added the text, and the legend of who everyone is at the bottom. And the finishing touch as always, is adding my signature, in this case in the bottom left.

Cox-Christmas-2013-Card-Design-2-final

So what’s your guess on how long it took to complete this project? All in all, it took about 23 hours including both the camera and digital designing time, and that doesn’t count working with the printer and mailing company to get it all out to each of you. Hopefully when it comes, it brings a smile to your face. If your address has changed, let me know so that I can update it for the next mailing I send out.

I hope all of you have a joyous season with family and loved ones. Merry Christmas!!

And until next time, America.

Ollie’s Outdoor Family Portraits

I love to photograph families, and this family was so great! Their kids were adorable and we became fast friends. In fact when I saw them again at the order appointment, they were super excited.

We started the session off outdoors in the studio gardens with some group portraits. Here are a few of my favorites.

Cox_Bigler-F-135

Cox_Bigler-F-131

Then before attempting to photograph each little girl alone, we created some trios as each played with a parent.

Cox_Bigler-F-8x20a

Cox_Bigler-F-8x20b

Then I focused on the oldest little girl. She totally hammed it up and helped me create this series. I couldn’t cut one image, so I created this collage.

Cox_Bigler-F-12Collage

The smallest girl needed a change of scenery to revamp her smiles, so I set up in the studio and created these images of her for a matching collage.

Cox_Bigler-F-12Collage-2

I love creating images that are a mixture of fun, emotional, and timeless. I want people to love and enjoy the images I create now as well as in 50 years. I am very pleased with this session and had a ball working with this tiny girls.

Now is the best time to get the ball rolling for some family portraits so that you can have them finished for Christmas. I can even create some wonderful Christmas cards with your family portrait as well. Give me a call and let’s find a day to create something beautiful for you! 801-728-3317.

Until next time, America.

Julie’s New Fun Portraits

I had the pleasure recently to photograph Julie. We did a mix session of both outdoor and indoor and here are my two of my favorites. This outdoor image was created at sunset on the edge of the cornfield next to my studio. We had to hurry as the sun was setting, but I loved how it turned out, especially with the leading lines from the rows and the depth in the lighting.

Cox_JWalker-S-203

And here’s a black and white from the studio – great eyes and great smile – and finished with one of my duo-tones.

Cox_JWalker-S-130-edge

If you’d like some great new portraits, give me a call. Let’s get it done now before the Christmas rush. 801-728-3317.

Until next time, America.

Hayden’s Senior Portraits

High school seniors and grads are a joy to photograph because I get to create images that are more fun and edgy, plus the seniors love it. Here is a shoot I did of Hayden.

Instead of just taking pictures of someone, I photograph who they are and that includes what they enjoy doing. Here is an intricate collage design of Hayden in his team basketball jersey.

I love groupings of images, and here I did some fashion lighting and created a series of three, grouped into a trio to show different sides to his personality.

Most seniors will get one of my signature art pieces like this one, where everything, the background, edges, and entire look are created custom every time in post production for a really unique look.

Black and white can be timeless and edgy if done right, and I choose that medium to create this image of Hayden in his officer’s sweater so that the attention goes right to his eyes.

School is starting soon which means that right now is the best time for the class of 2003 to make their appointments. Right now you’ll have your summer tan, summer schedule, you can beat the rush and get the best pick of available times, and there is a special for seniors in August! Give me a call at 801-728-3317 to make an appointment.